When working on NLP projects, you typically need to run lots of things: data processing, annotation, training, evaluation, testing and many more iterative steps. This is hard to solve with only a coding assistant. Ellf comes with a platform that makes it easy to run and monitor your different processes, locally and in the cloud, and collaborate on them with your team.
Projects let you group tasks, actions, agents and services together within your organization. For example, if you’re working on a new model or component, you would typically create a project for it and create all related tasks and actions within that project. You can manage projects in the web UI or via the ellf projects CLI.
Within a project, you can create, run and manage tasks, actions, agents and services, and see their current status at a glance:
Annotate entitiesSTARTED
Named Entity Recognitionner
Annotations
2452
Annotators
3
Agents
1
Train a pipelineSTOPPED
Train a spaCy pipelinetrain
Executions
42
Last execution
2 hours ago
Auto-labeler for NERSTARTED
Gemini Annotation Agentgemini_agent
Tasks
2
Annotations
1204
Generate PatternsSTARTING
Pattern Generation MCP Serverpattern_gen
Uptime
—
Last updated
1 minute ago
The projects dropdown at the top shows all available projects and lets you switch between them, edit the current project and create a new one. Projects require a human-readable name and description shown across the app.
You can also create projects on the CLI via ellf projects create. When successful, it will output the details of the project that was created.
Creating a project
$ellfprojectscreate"My first project""Getting started with Ellf"
id 838e401c-f070-44de-b6a7-3db840e9dc7c
created 2026-01-16 10:25:22.511856+00:00
updated 2026-01-16 10:25:22.511863+00:00
org_id 8b428d0e-b44a-40b3-8886-53a9018f2c81
name My first project
description Getting started with Ellf
Once your project is created, it will show up in the overview in the UI, as well as the list of projects in ellf projects list. You can also get detailed info for a given project or delete a project.
When using the CLI, you typically want to use config project to set the default working project, so you won’t have to specify the --project argument every time you run commands. You can also define the working task, action, agent or service this way. In the web app, the command bar at the top shows the CLI command that corresponds to the current page or view, making it easy to switch between using the app and CLI.
If you’re working on the CLI, you can use the ellf config command to configure the default project, task, action, agent or service so you don’t have to keep repeating the name or ID in the commands. For example:
Default project set as 838e401c-f070-44de-b6a7-3db840e9dc7c
You’ll then be able to leave out the --project argument on other commands and it will be picked up automatically. You can do the same to set the current working task, action, agent or service.
Projects also contain plans created by Ellf’s project planning module. These are Markdown documents that are continuously updated and outline the end-to-end development plan, including step-by-step workflows, todo lists and higher-level strategic goals. Ellf refers to the project plan across its different modules and your local coding assistant reads and updates it as you work.
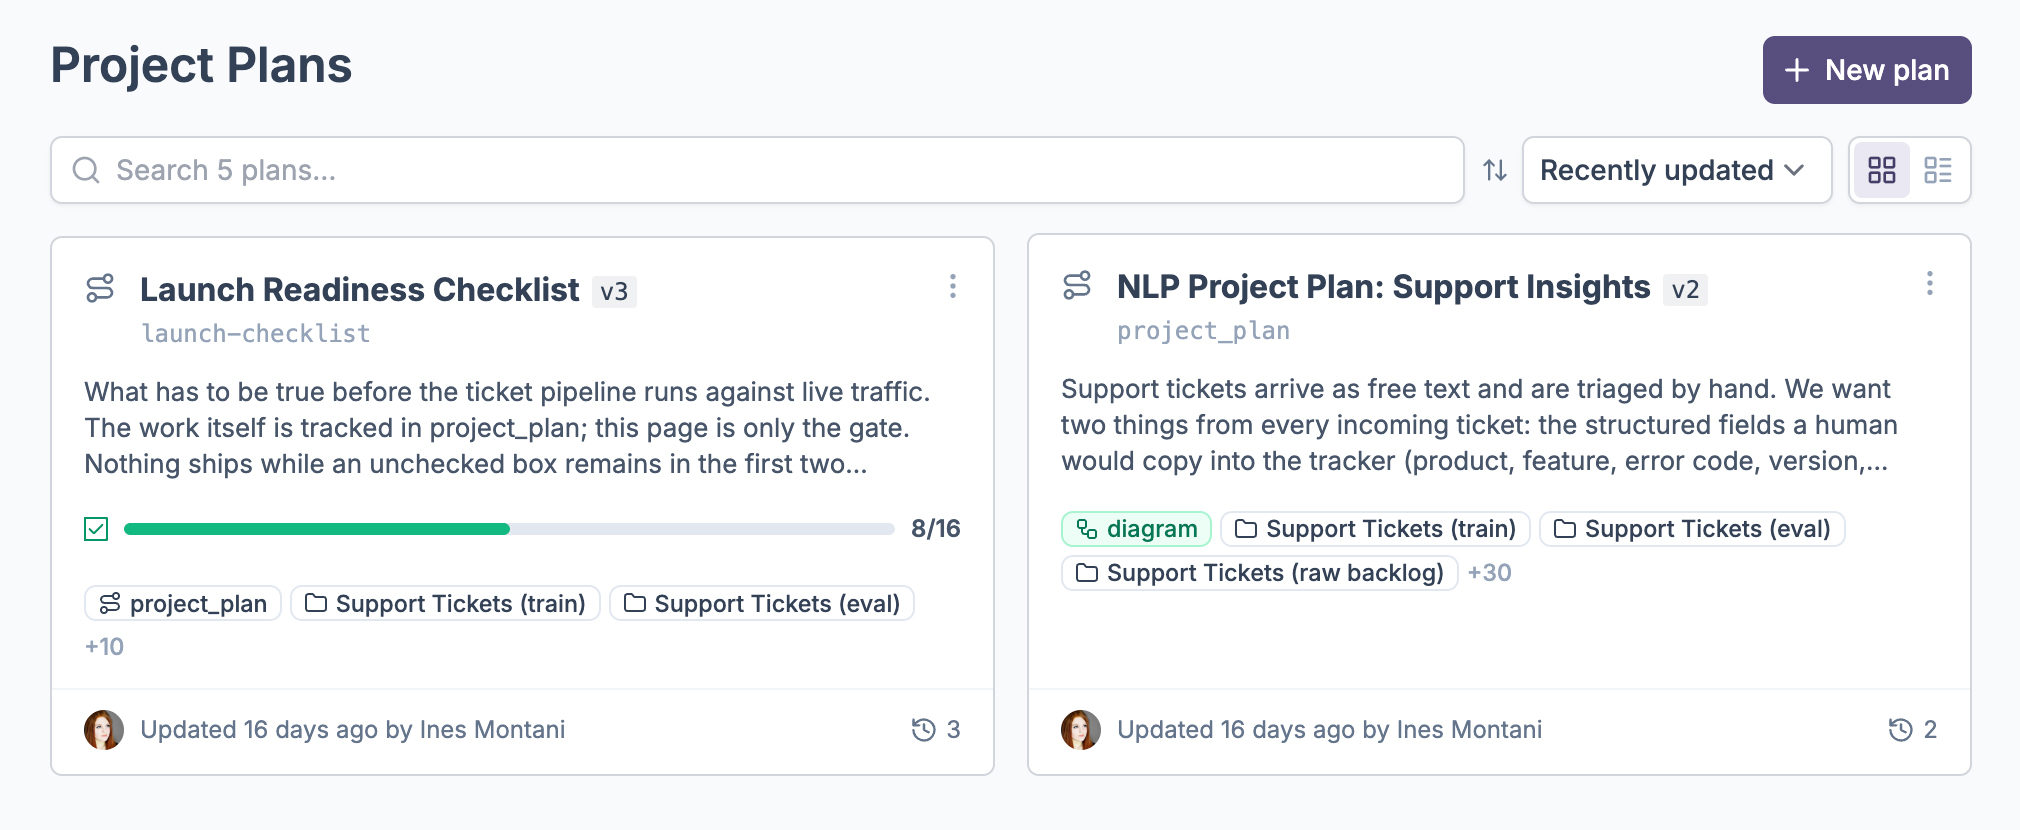
You can view project plans in the UI via the Plans page or using the plans CLI. Plans are also versioned with tracked changes as the agent or user makes edits to them.
Overview of project plans in the app
Project Plan: Fraud Report Classifier
NLP Project Plan: Fraud Report Classifier
Problem Statement
Build a pipeline that processes analyst-written fraud investigation summaries and produces four outputs: fraud type (multi-class, 6 labels), affected product, urgency level, and legal escalation flag. Urgency and legal escalation are derived from business rules applied downstream of model predictions — not model outputs themselves. Starting from scratch on annotation.
Pipeline Overview
Analyst report text
│─→ [Fraud Type Classifier] ← supervised textcat, 6-class exclusive
|─→ escalate: urgency == HIGH → legal team routing
Key architecture decision: Urgency and legal escalation are policy decisions, not language-understanding tasks. Internal thresholds ($100K, insider fraud type) are encoded as rules owned by the fraud team, not embedded in model weights.
Components
Component
Approach
Rationale
Fraud type
Supervised textcat, 6-class exclusive
Core NLP task; domain-specific; needs training
Social engineering vector
Supervised textcat, binary
Method flag separate from outcome type; binary is fast to annotate
Product extraction
PhraseMatcher rules
Analyst reports name products explicitly; rules are fast and auditable
Amount extraction
Regex / spaCy MONEY entity
Structured format; rules are sufficient
Urgency
Business logic rules
Thresholds ($100K, fraud type) are policy, not language
Social engineering: Binary vector flag, not a fraud type label. It’s a method, not an outcome.
Evaluation-first: 100-doc test set held out before annotation begins.
Project Plan: ADR Detection in Medical Literature
NLP Project Plan: ADR Detection in Medical Literature
Problem Statement
Detect and extract structured adverse drug reaction (ADR) mentions from ~500 biomedical paper abstracts (currently in PDF/mixed format), producing typed drug-ADR pairs suitable for ingestion into a pharmacovigilance database.
Pipeline Overview
PDF/mixed source
  └─> [Phase 0] Text extraction (Docling / pdfplumber + spacy-layout)
        └─> [1] DRUG NER  (scispaCy BC5CDR baseline → fine-tune if needed)
        └─> [2] ADVERSE_REACTION NER  (same model, separate eval pass)
              └─> [3] Relation linking (sentence co-occurrence + negation → NLI reframe if needed)
                    └─> [4] Normalization (DrugBank/RxNorm, MedDRA) — business logic, not ML
Data Strategy
~500 abstracts in PDF/mixed formats — text extraction required before NLP work
Nothing annotated yet
Plan: LLM pre-annotation (GPT-4 via spacy-llm) → expert correction in Prodigy
Set aside ~100 abstracts as held-out eval set before any annotation begins
Target: ~300–400 annotated abstracts for NER training
Annotation Plan
Schema
DRUG — drug/substance mention spans (generic, not role-specific)
ADVERSE_REACTION — adverse reaction term spans (generic)
Relations: drug-reaction pairs (separate pass after NER is stable)
Schema principles
Do NOT use composite labels like “DRUG_CAUSING_ADR” — couple NER with role assignment is a mistake
Normalization to DrugBank / MedDRA is business logic downstream, not part of the annotation schema
Workflow
Pilot: 50–100 abstracts, domain expert annotates DRUG spans only (correction of BC5CDR predictions)
Evaluate BC5CDR baseline on same set — decide how much fine-tuning is needed
Relation pass: link drug-reaction pairs within sentences
Train first model after pilot, run training curve, validate learnability before scaling
Team
1–2 domain experts (clinicians / pharma researchers) — ideal small expert team
Prodigy on Ellf cluster for annotation
Evaluation Strategy
Hold out ~100 abstracts as a fixed test set before training starts — never train on these
Evaluate NER with token-level and span-level F1, split by entity type
Rule-of-10: distinguish 85% vs 90% accuracy needs ~1000 span-level eval examples — plan accordingly
Relation evaluation: precision/recall on drug-ADR pairs (exact match: both spans + link correct)
Run training curves after pilot to decide whether more annotation helps or schema needs revision
Baseline: evaluate scispaCy BC5CDR out-of-the-box before annotating anything
Roadmap
Phase 0 — Text extraction (prerequisite)
Extract clean abstract text from PDFs
Tools: Docling, pdfplumber, or spacy-layout
Output: plain text files per abstract, ready for annotation
Phase 1 — Baseline evaluation
Run scispaCy en_ner_bc5cdr_md on 50 sample abstracts
Measure what it gets right on DRUG and ADVERSE_REACTION before committing annotation budget
Phase 2 — NER annotation + model
LLM pre-annotation → expert correction in Prodigy (ner.correct)
Single-label passes: DRUG first, ADVERSE_REACTION second
Train after pilot, run training curve, scale only if curve is still rising
Phase 3 — Relation extraction
Start with rule-based co-occurrence + negation detection as baseline
Escalate to NLI reframe (“drug X caused reaction Y” → entailed/neutral/contradicted) if needed
Phase 4 — Normalization (business logic)
Map DRUG spans to DrugBank / RxNorm
Map ADVERSE_REACTION spans to MedDRA
This is a lookup layer, not a model — keep it separate from NLP components
Next Steps
Solve text extraction (Phase 0) — this is a blocker for everything else
Evaluate scispaCy BC5CDR on a sample before annotating
Set up Prodigy annotation task on Ellf with LLM-assisted pre-annotation
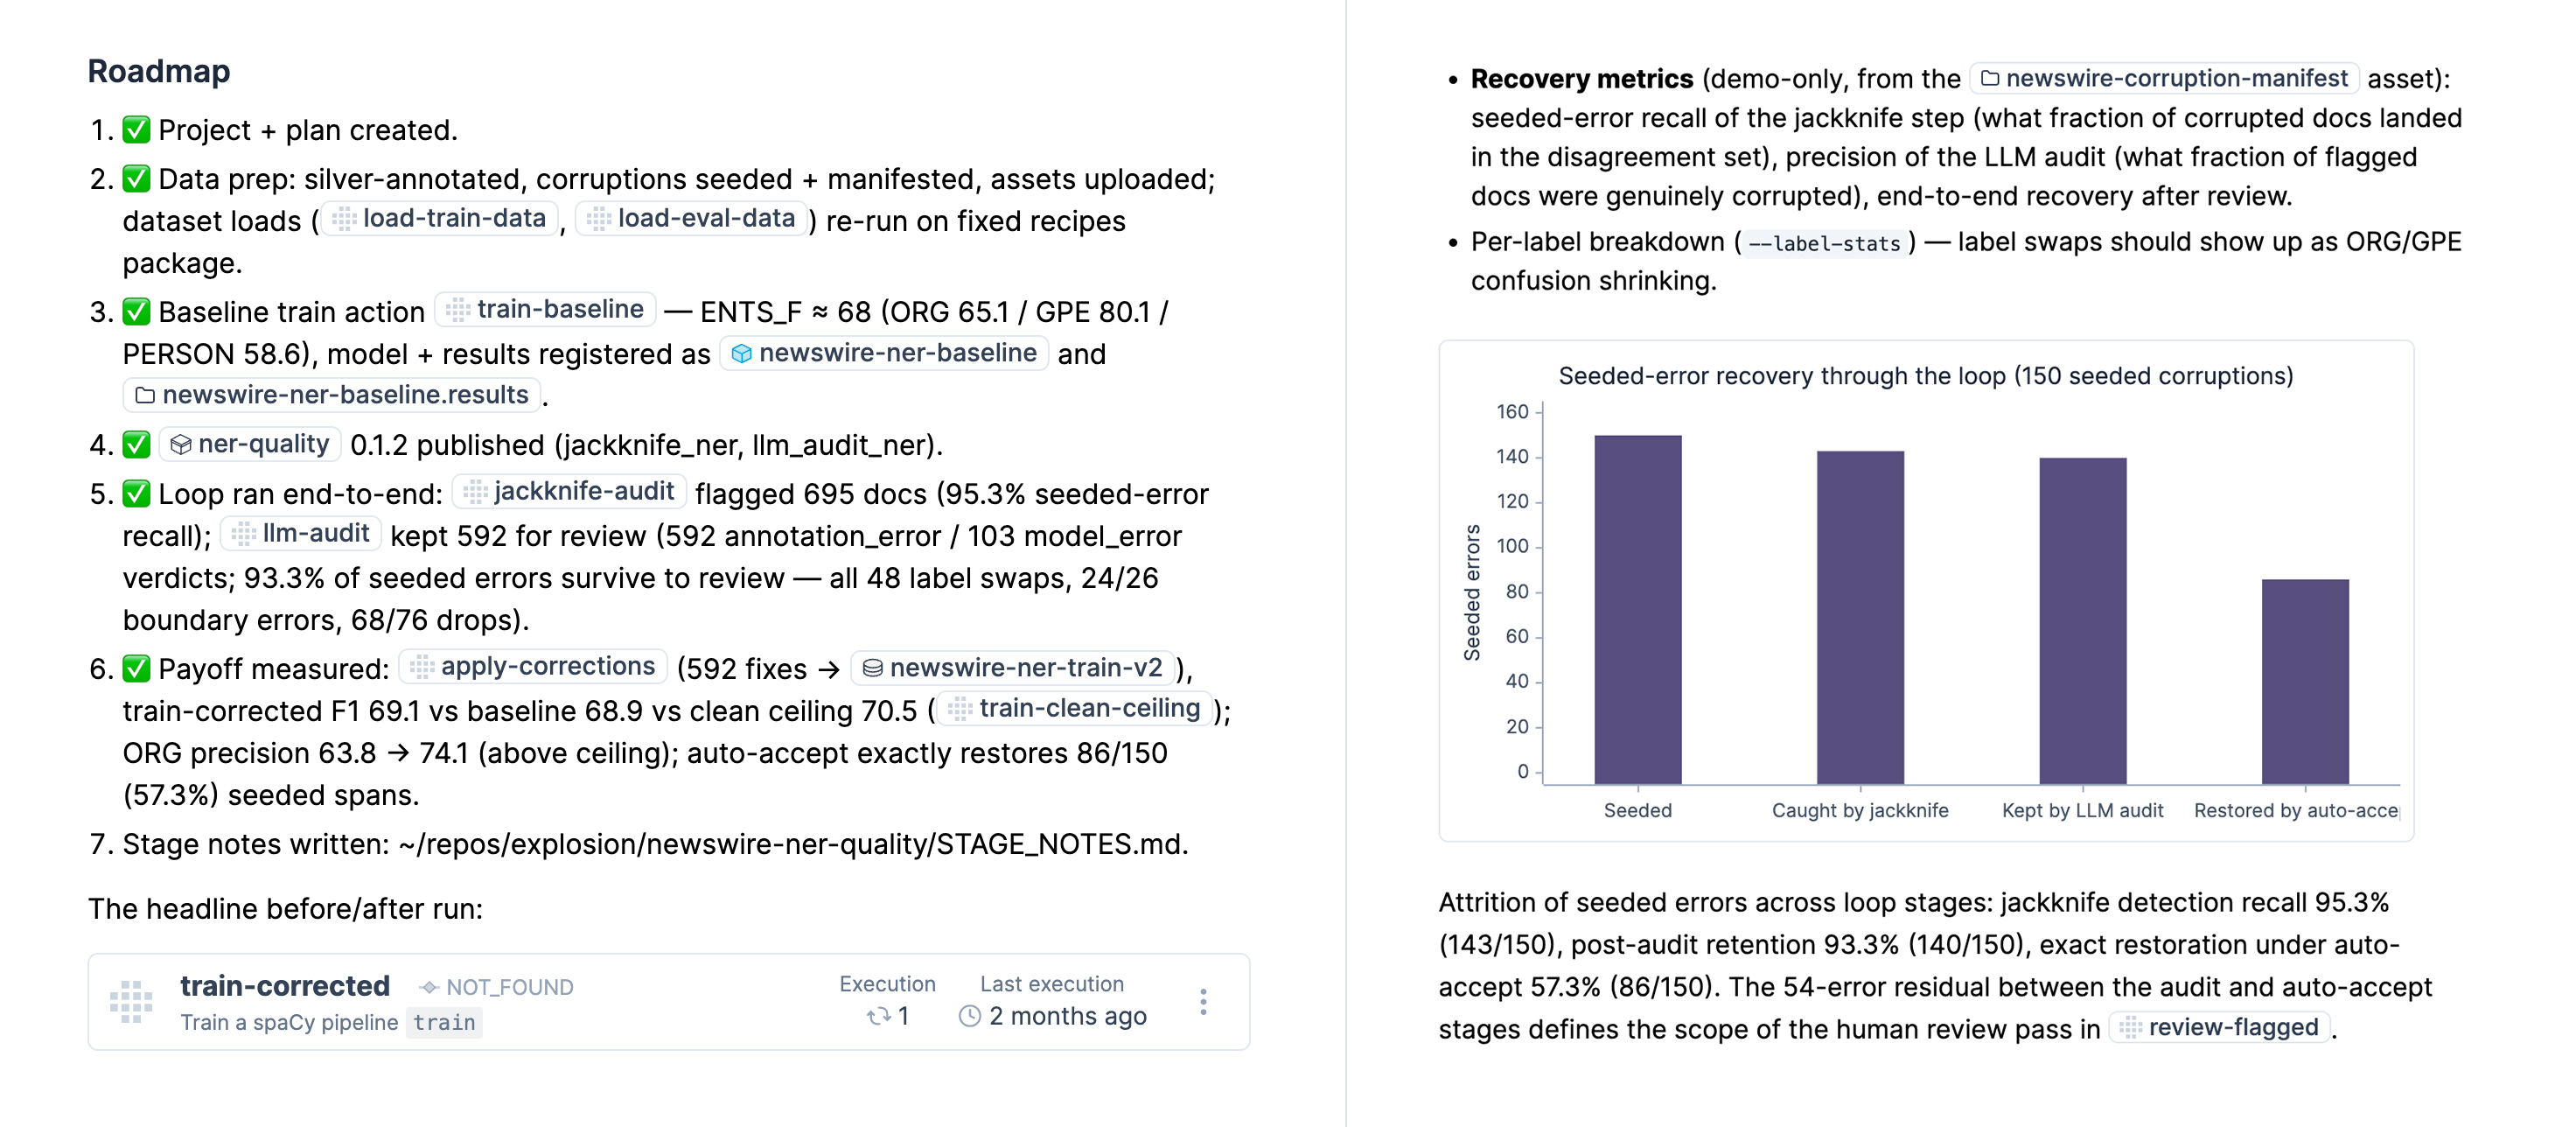
Project plans also support special Markdown links using UUIDs of concepts in the platform: projects, tasks, actions, agents, services, assets, users and other project plans. In the rendered project plans in the platform, these will automatically be turned into cross-reference links. If the link to a task, action, agent or service is provided on its own newline, it will be turned into a more full-featured embed with more details.
Internal links and embeds in project plans
Source: @[Assets/ag-news-train](019e3735-a7fc-7542-9a43-eb120c36e8d6) / @[Assets/ag-news-eval](019e3735-b062-7c82-ab16-9705a0d0bc02) assets already on the cluster (JSONL, news headlines + abstracts).@[Tasks/review-flagged](019eb373-4452-7443-8124-5bae5822ff8a:019eb142-83fb-7633-a2d2-8e0c3e17d973)
You typically don’t have to include these links manually and they’ll be added automatically by the agent as it creates things in the platform and updates the project plan accordingly.
Project plans also support charts and diagrams powered by Mermaid, using a straightforward syntax within mermaid-fenced code blocks. This enables Ellf and your coding agent to visualize accuracy figures, data statistics and pipeline flowcharts. The agent is instructed to use visualizations very sparingly when authoring project plans, but you can always ask it explicitly if there’s data you want to see in a diagram.
Project plan details with cross-reference links and visualizations
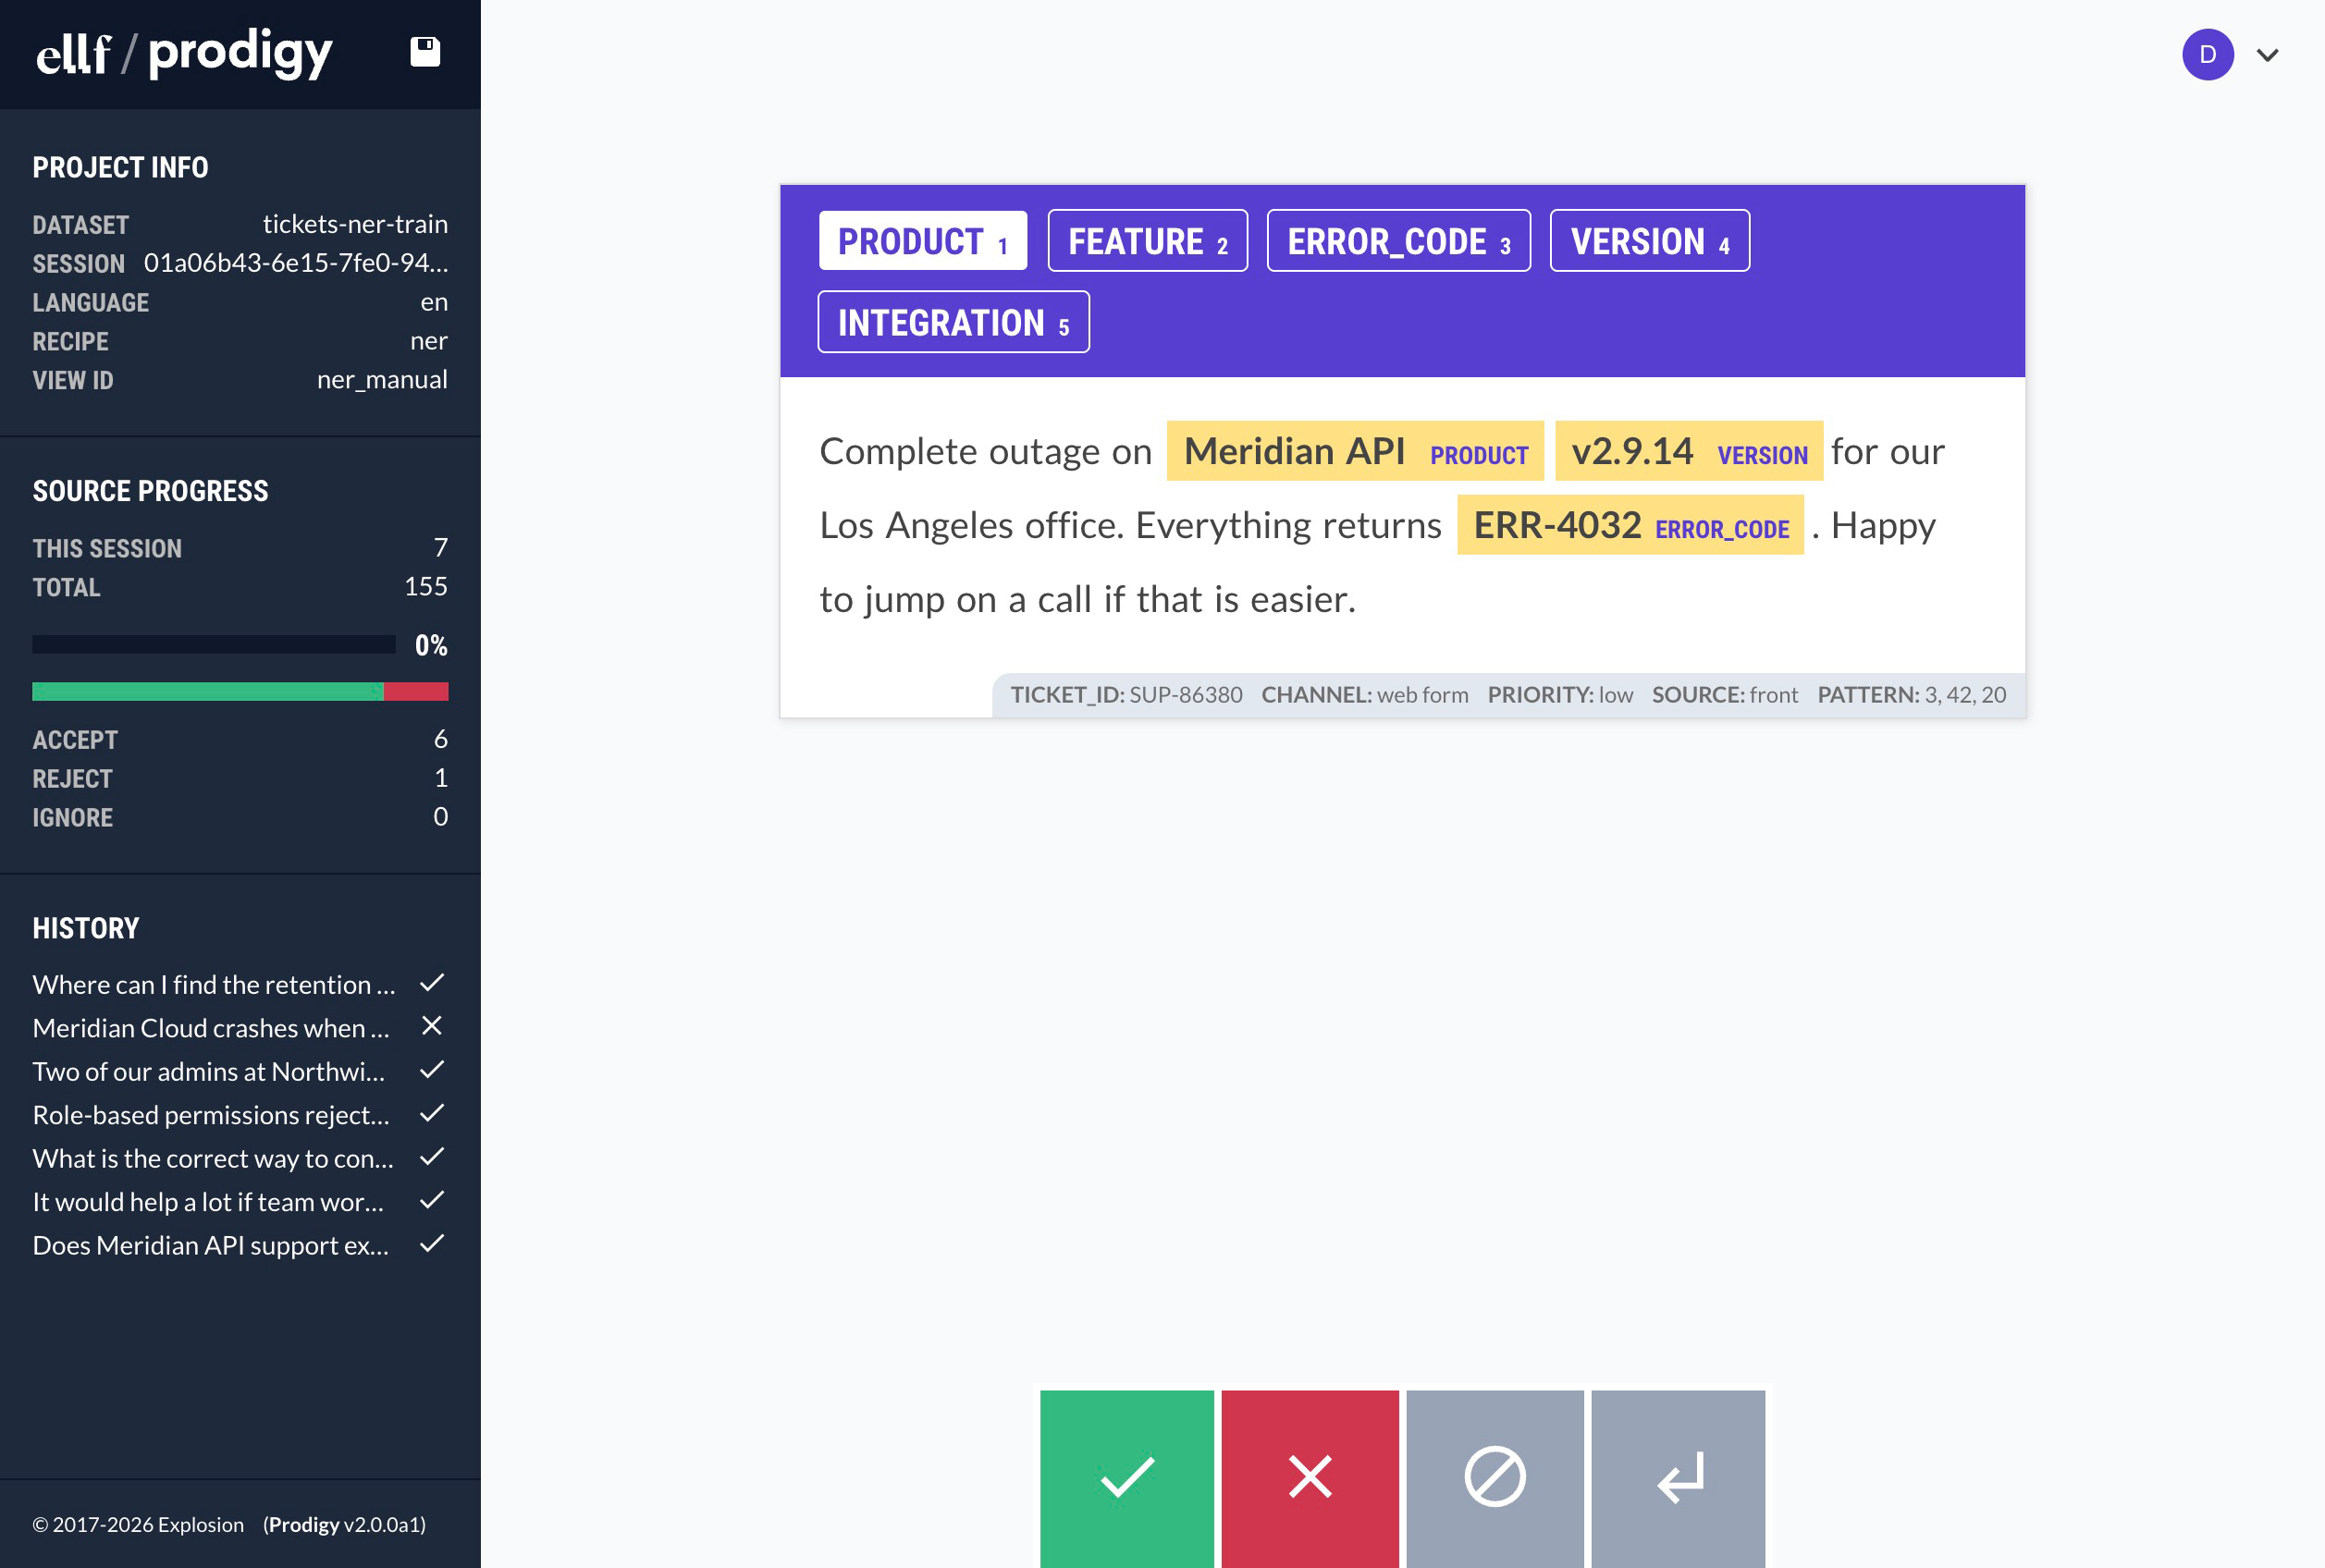
Ellf ships with our popular annotation solution Prodigy for efficient data labelling, and brings it into a collaborative cloud environment. When you start a task, Ellf will spin up the annotation server using one of the available recipes for NLP tasks like span annotation, text classification or relation extraction. You can then assign human annotators as well as automated annotation agents, and view their progress in the app and on the CLI using the tasks command. The annotation process runs entirely on your cluster, so your data stays fully private and under your control.
Annotate entitiesSTARTED
Named Entity Recognitionner
Annotate categoriesSTOPPED
Text Classificationtextcat
Ellf’s data annotation module also makes your coding assistant proficient at annotation best practices and helps you design your label scheme, structure your annotation task and configure the right annotation interface. The Prodigy module knows Prodigy’s developer API and helps you implement fully custom workflows and interfaces.
The app shows you an overview of your available tasks, running and completed annotation sessions, as well as the created data. To create annotations yourself, you can click the Annotate now button on the task page. Admins and developers can always annotate, and annotators assigned to a task are able to access the annotation UI only. To add them, click Add annotators in the app or use the users assign command.
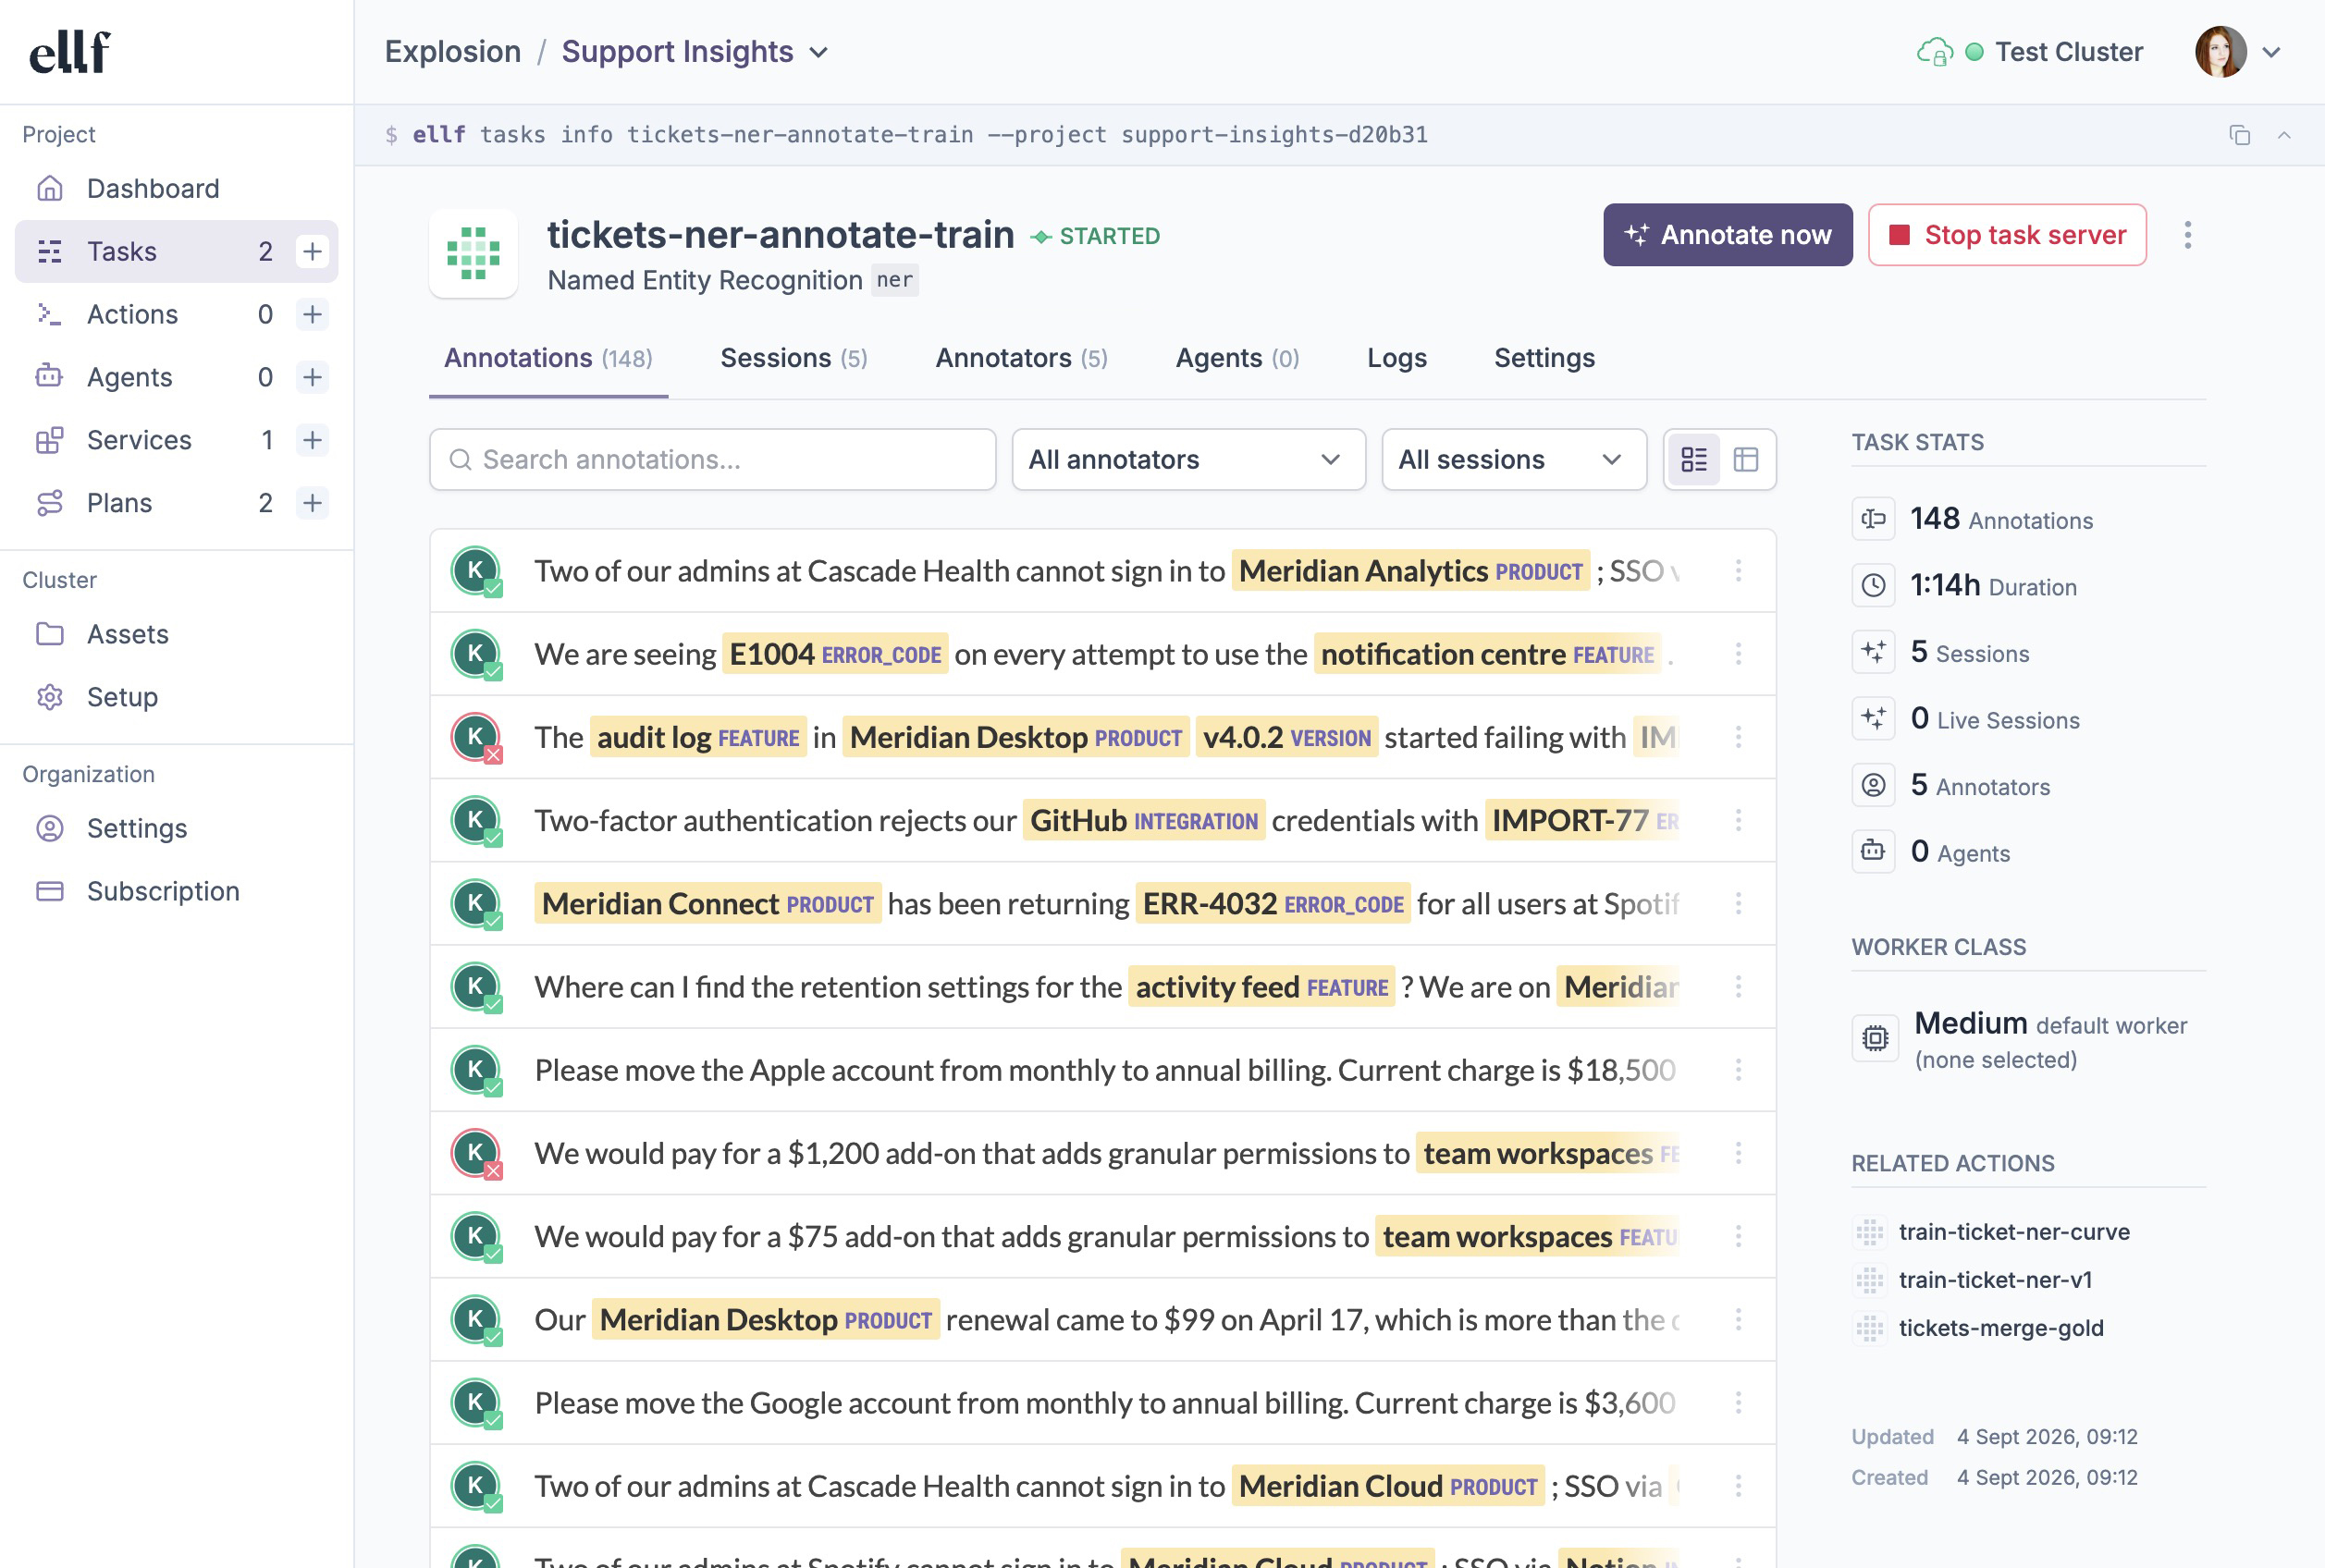
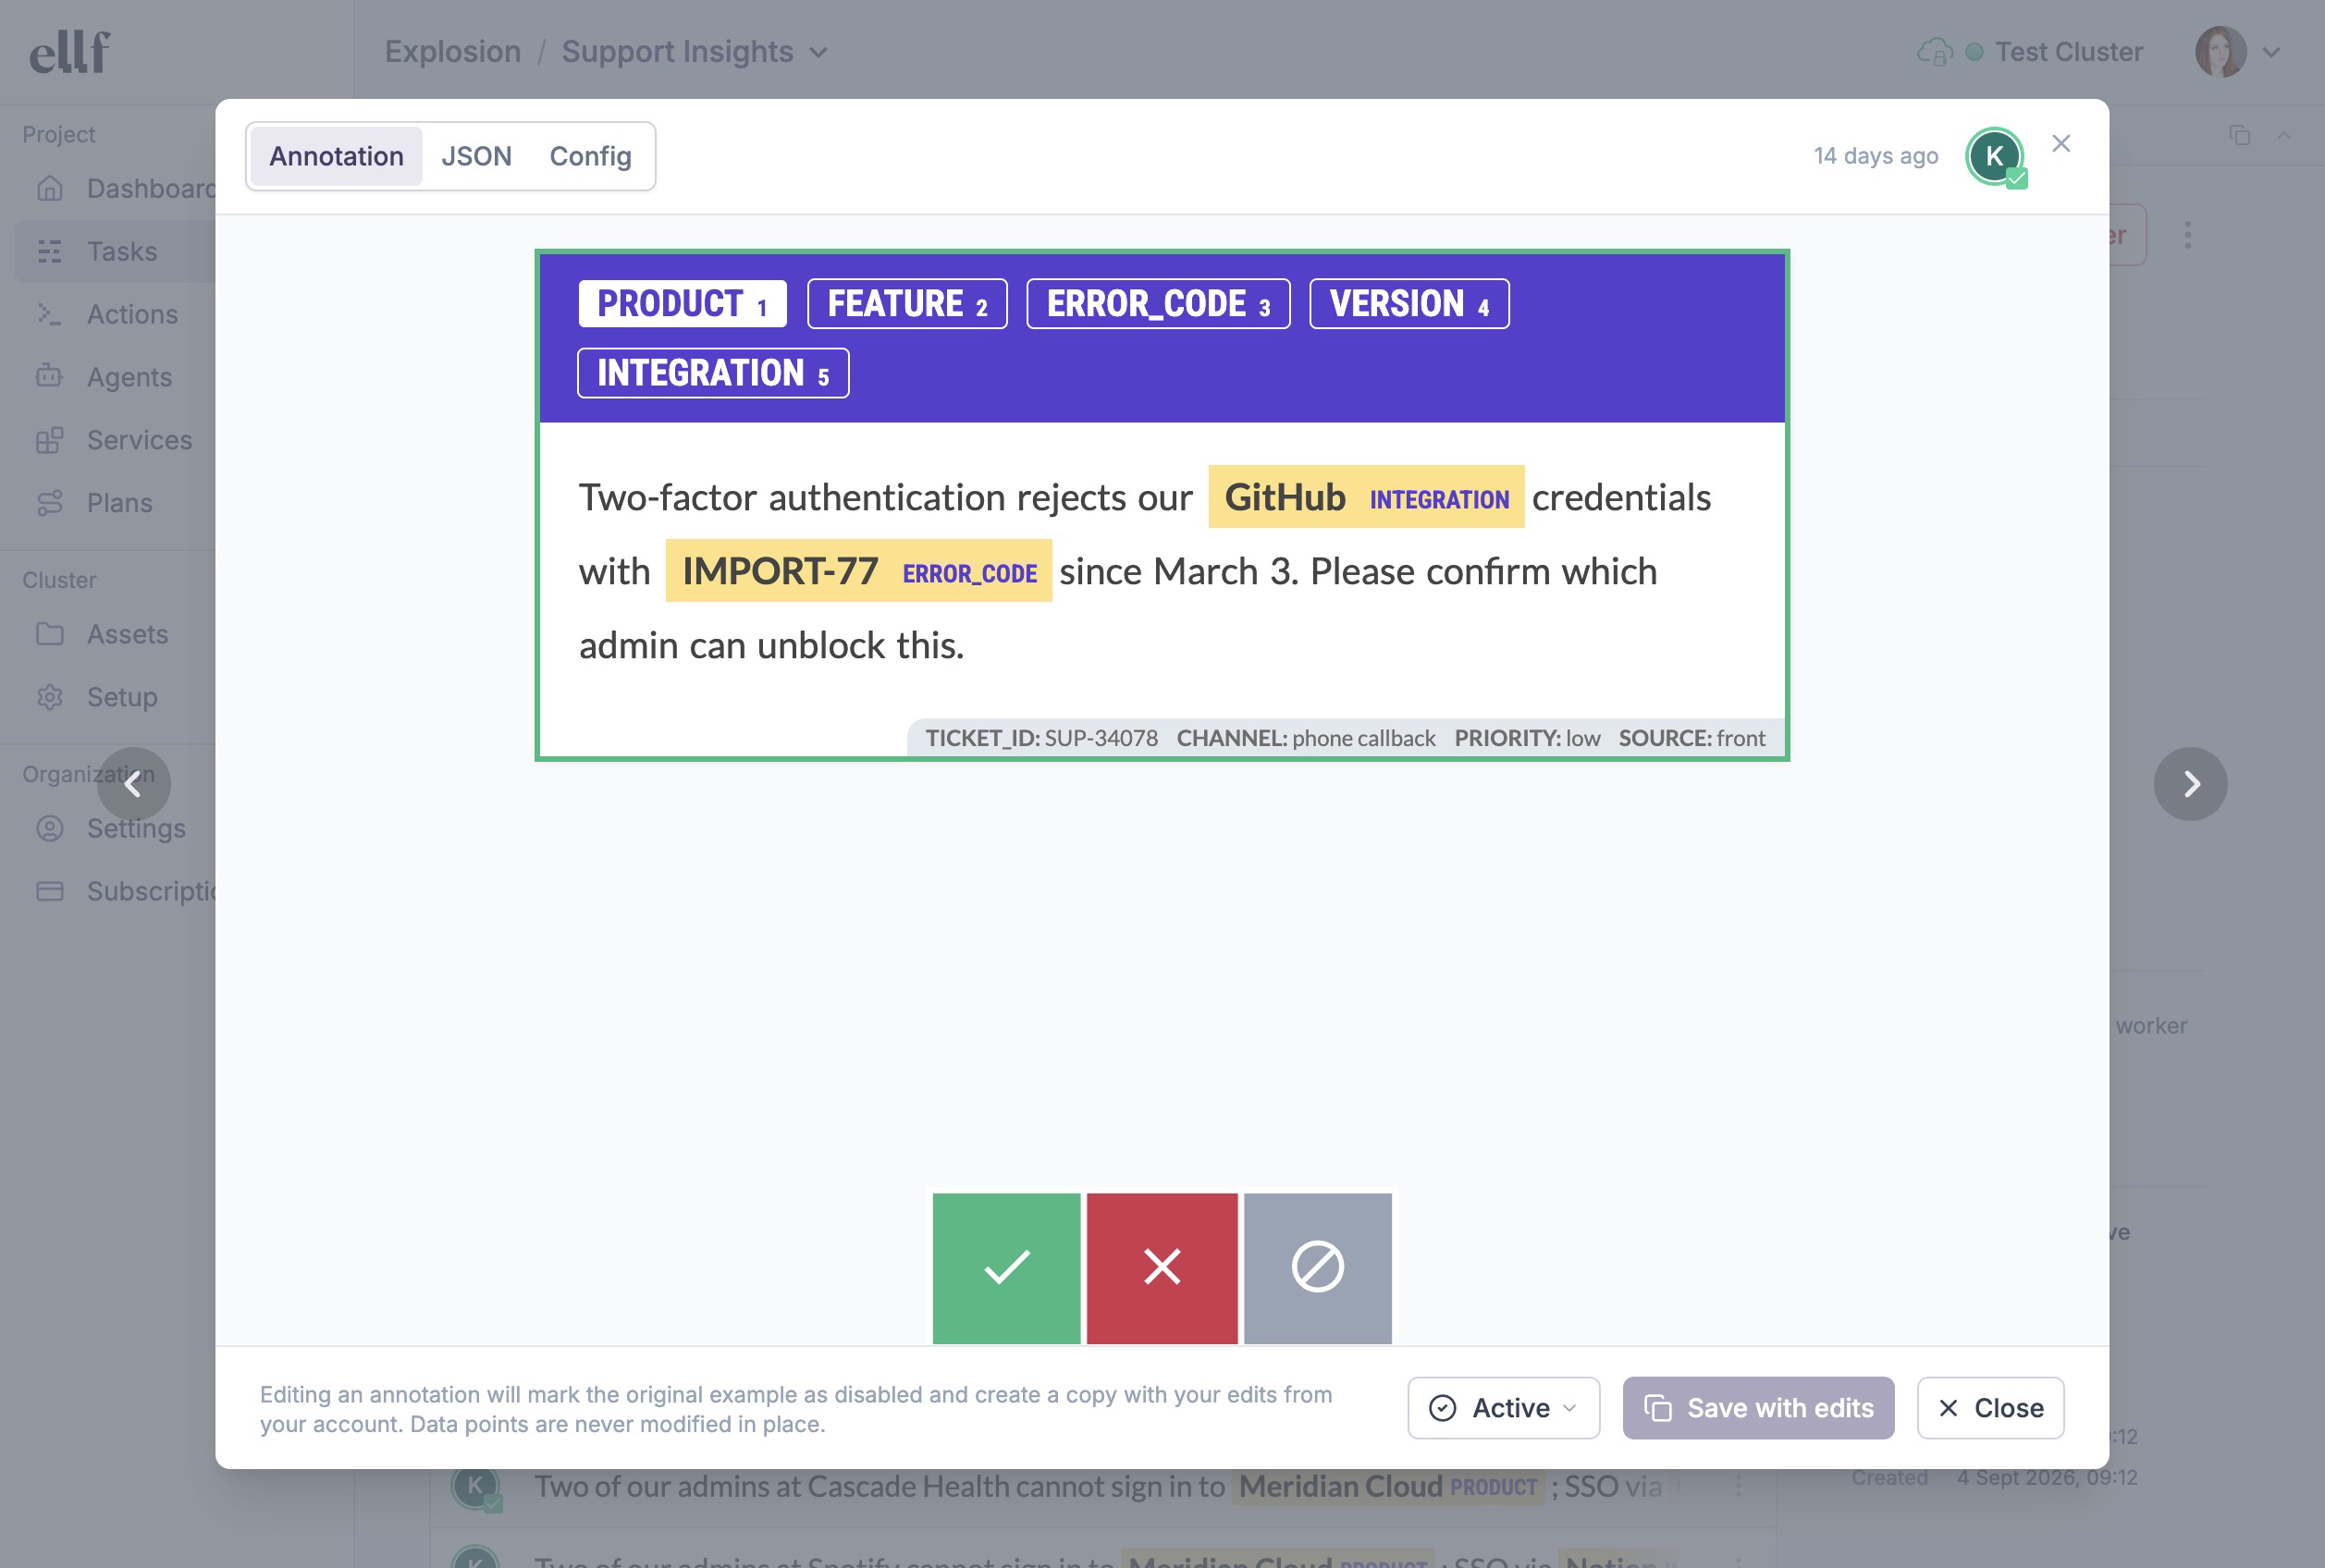
Annotated examples in the appProdigy annotation UI
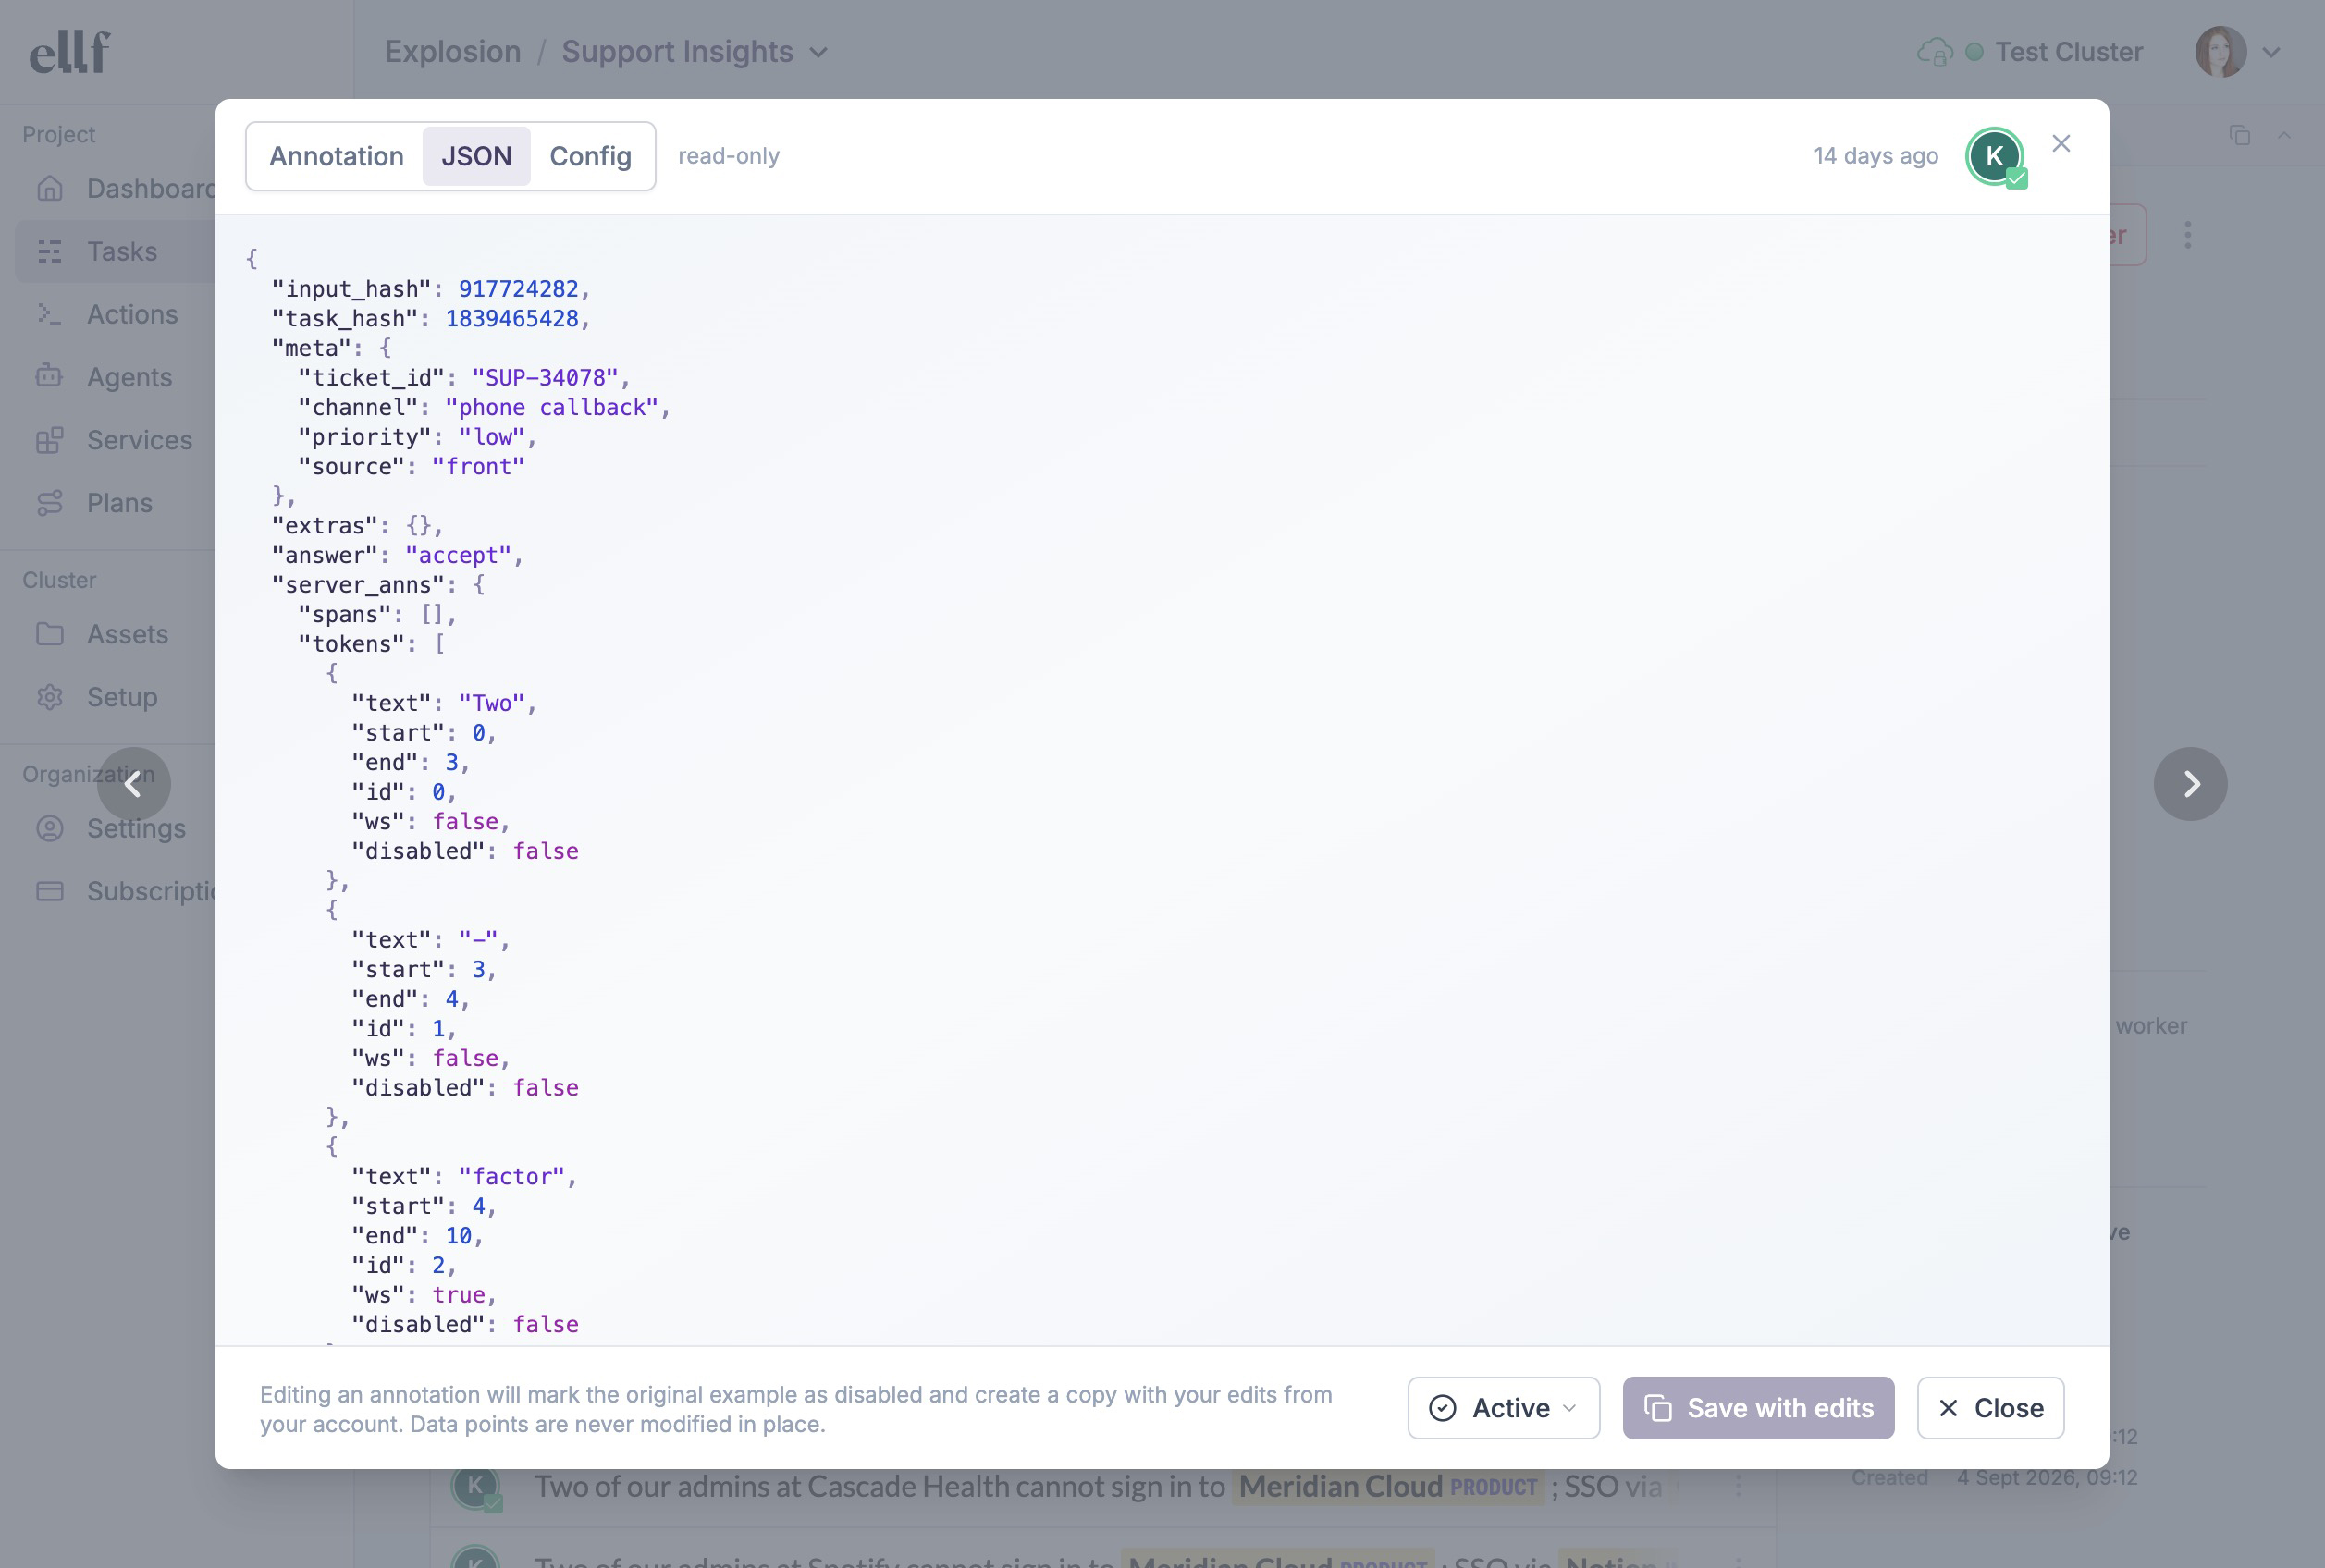
The annotations tab lists the annotated examples with an inline preview and the avatar of the user or agent who created the annotation. On click, it shows the example and its underlying config and JSON data, which depends on the data type and interface used. The data and visual preview is fetched and served straight from your cluster.
Visual data viewJSON data view
Editing an example saves your edits as a new annotation of yours and marks the original as superseded. Once an example is added to the database, it can never be changed in place. This ensures that no data points are lost and you’ll always be able to compute accurate metrics like inter-annotator agreement. By default, the list only shows the annotations currently in use – select All to also include superseded and excluded annotations.
You can also exclude examples you don’t want to use, e.g. mistakes or duplicates, from the example’s menu. Excluding an example saves it with the answer ignore, so it’s left out of training and exports, and activating it again restores the answer it had before.
Under the hood, annotation tasks are powered by recipes, Python functions that configure the data, workflow and interface to use. Ellf makes it easy to implement and add your own, including with the help of your coding assistant.
Recipes can also define custom interfaces that combine existing UI components or implement custom interactive UIs using HTML, CSS and JavaScript and event hooks. In your coding assistant, you can use Ellf’s Prodigy module to specify your requirements and have it build the right interface for you. For more details and an example, see the page on Ellf for Prodigy users.
Under the hood, the database on your cluster includes the JSON data of each example, as well as its full config containing both global settings as well as settings specific to the interface (for instance, the available labels, whether multiple-choice options are mutually exclusive, or how the interface should behave). This ensures that each example can be displayed exactly as the annotator saw it.
Each annotation in the app also has an ID, e.g. #1234, that you can view and copy via the example dropdown. You can also search examples by ID. If an example is superseded by a correction, Ellf will display this information with links to the respective example IDs below the annotation preview.
Examples are never modified in place. Editing an example saves the edited version as a new example attributed to you, and marks the original as superseded, so the dataset only uses the latest version while the full history is kept. Excluding an example works the same way and saves a new version with the answer ignore. Excluding a session doesn’t change its examples at all: it removes them from the task’s active data but keeps them in the session’s own dataset, so it can be restored at any time.
The icons and colors on the avatars correspond to Prodigy’s accept, reject and ignore buttons and indicate whether the annotator has accepted, rejected or ignored the example. The distinction between accept and reject is especially relevant in binary workflows where annotators decide whether a suggestion is correct or not, or during data curation to indicate whether an example should be included or not.
Examples marked as ignore are excluded and it’s recommended to encourage annotators to skip examples if they’re unsure and to not disrupt the annotation flow by spending too long on a single decision. You can later filter and review ignored examples to potentially spot problems or relevant edge cases in your data or improve your annotation guidelines.
Ellf fully integrates with Prodigy and adds a range of features to help you scale up and automate your data development. This includes a collaborative annotation environment with user management to assign annotators and agents to tasks, and the ability to configure annotation tasks via a UI form or your coding assistant. Ellf ships with built-in recipes covering all common Prodigy workflows and also lets you add your own custom recipes using the same familiar Python syntax. Actions then make it easy to train models and run experiments using your data. For more details, see the page on Ellf for Prodigy users.
In the standalone installation, Prodigy lets you set global and interface-specific settings via a prodigy.json file. In Ellf, config overrides can be provided per task or per project in the same JSON format, and via the respective settings in the web app or CLI. For more details, see the docs on configuring Prodigy.
Project-level overrides are the default for all projects and can be overwritten by the task config. Note that Ellf only supports overwriting config settings for personal preferences like user experience and interface style, not config settings that modify the annotation task and logic itself.
While Ellf ships with built-in and first-class support for our annotation tool Prodigy, you can also plug in other tools, including your own internal annotation apps. Ellf provides several options to implement this type of integration.
Services let you run and host any custom apps and APIs on your cluster and manage them within the platform. This lets you add and run your annotation tool within Ellf. Your tool can either save data in Prodigy’s JSON format and add created annotations to the built-in database programmatically, or it can use a separate database running on the cluster or another remote server. In your Ellf workflows, you can then import or fetch the annotated data and use it for training, analysis or further processing.
Alternatively, if your annotation tool is running outside of Ellf and your cluster, you can use actions or a service webhook to automatically import your annotated data and save it as a data asset. As new data comes in, a new version of the asset is published and available in the platform, e.g. to use for training a model.
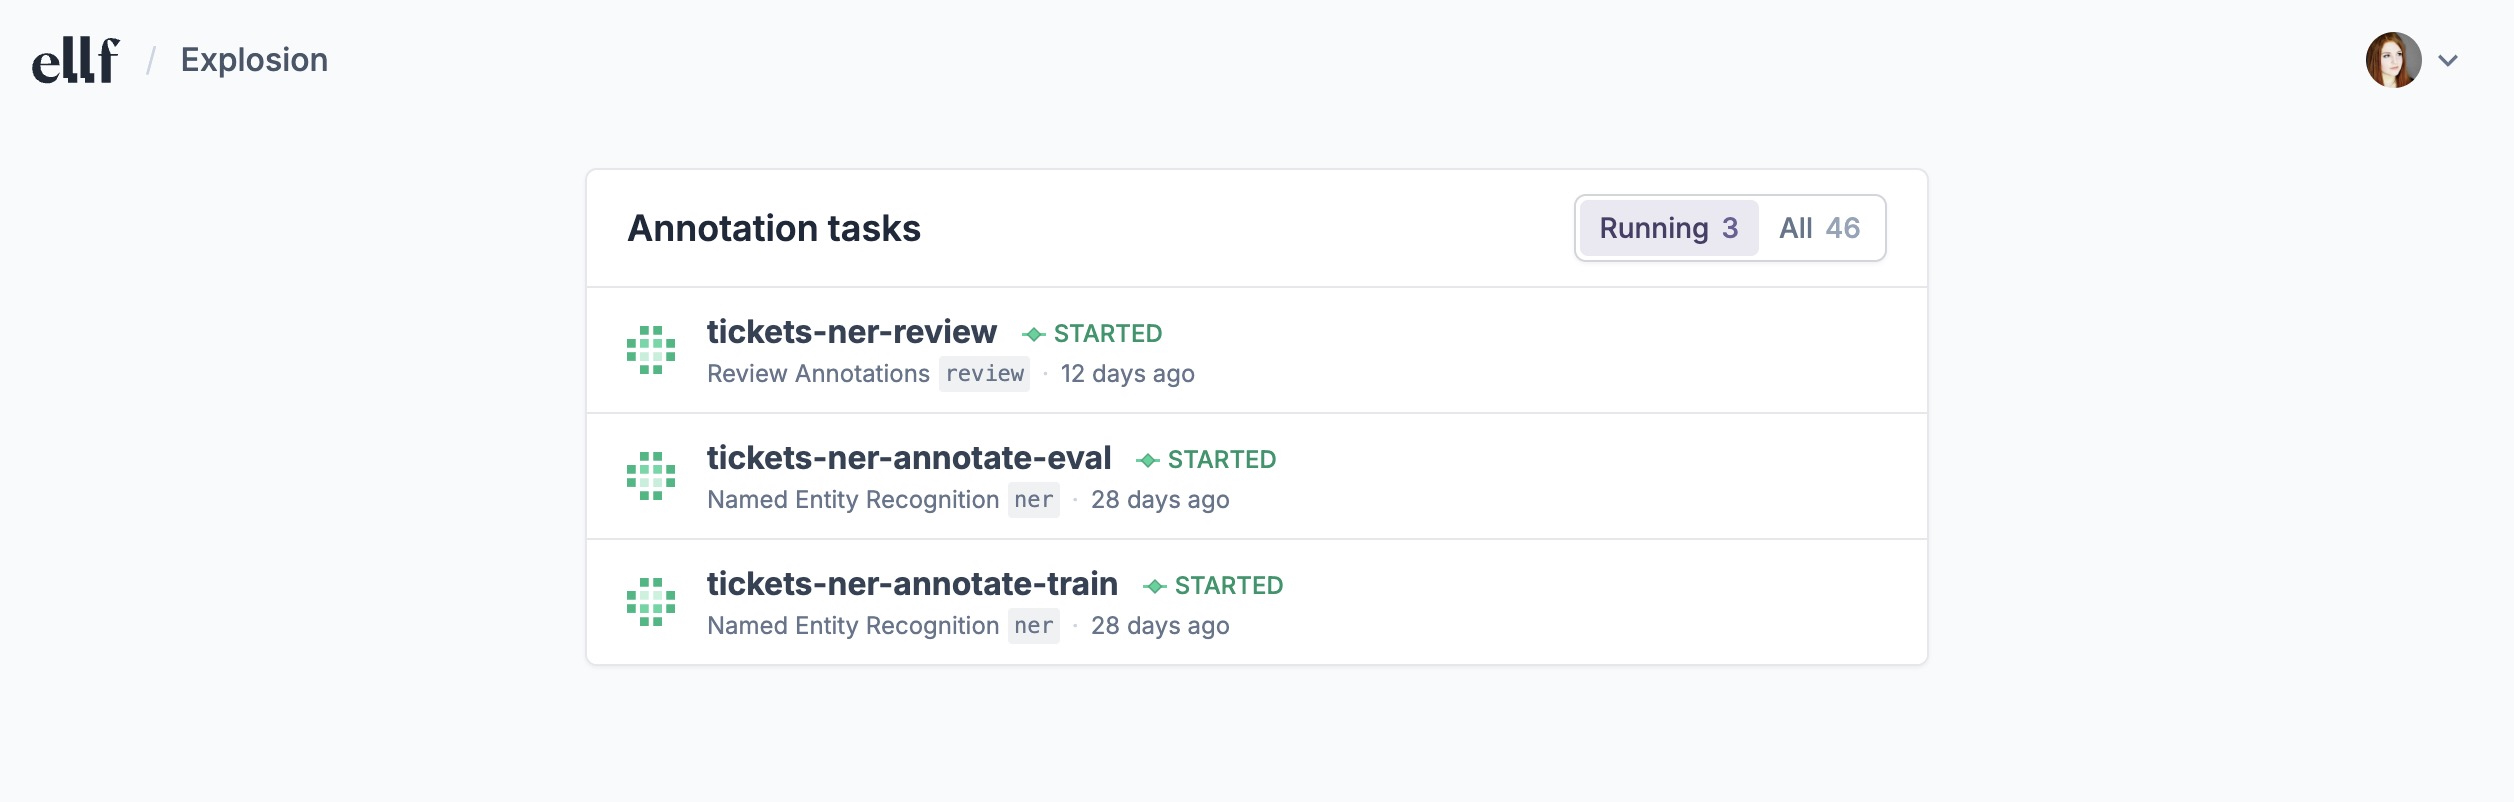
Users with the role annotator only have access to a dashboard showing the tasks they’re assigned to. Clicking on a task will open the annotation app. Admins and developers can also open their annotator dashboard via the user dropdown menu or account settings.
Organizations are your top-level account for Ellf and include your team members and projects. You’d typically have one organization for your company, although it’s also possible to have multiple orgs for different groups and departments if you need more fine-grained access control. To invite users to your organization, you can click SettingsInvite in the platform or use the users CLI.
If you’re part of multiple organizations, you can switch between them using the org dropdown in the top bar of the app. When you run login on the CLI, you’ll also be prompted to select the organization to connect to.
Selecting an organization during login
ℹ Multiple organizations are available:
[1] ACME Inc. (bec7a6a2-aa6a-4e63-9bc9-fc5b249aef26)
[2] Research Department (742ebbea-866d-4075-b0ff-4ce1513c5a3b)
Users can be assigned to one or more tasks, which also sends them an email notification. For users with the role annotator, this will give them access to the annotation UI and the task will show up in their dashboard. You can manage annotator assignment in the Annotators tab or the users overview in the app, or via the users assign and users unassign commands.
Organization admins and developers can always view and annotate tasks, so they don’t need to be added and assigned explicitly.
Auto-annotation agents will show up just like users and can be assigned in a similar way: either via the Agents tab or the agent page in the app, or via agents assign.
From the SettingsMembers tab in the app or using the users delete command, you can remove a user from your organization. This will free up a seat again. Ellf will keep the records of the removed user around and only mark it as deactivated, so you can still see their created annotations and other history in the platform.
Ellf provides three basic roles for users: Administrator, who has access to everything and can manage the organization, Developer, who has access to everything needed for working with and customizing Ellf, and Annotator, who only has access to the annotator dashboard and annotation UI for projects and tasks they’re added to. When inviting users, you can specify the role in the UI or via --role in users invite.
Administrator admin
Developer developer
Annotator annotator
Manage organization and billing
Invite developers and annotators
Access projects dashboard
Access annotator dashboard
Create and manage projects
Create and manage tasks, actions, agents and services
Upload data and code to cluster
Manage data and code on cluster
Add new clusters
Create annotations
About developer access to the cluster
Developers need to be able to upload code to the cluster and run it, so there’s no point in restricting their access within the cluster, since this could be circumvented by code anyway. If you need more fine-grained permissions for different cluster resources, you can set up and connect multiple clusters.
Ellf is priced per developer seat and every user with access to the platform requires a seat. The Professional plan also includes free and unlimited annotator accounts. For more details on the available plans, see the pricing page.
You’re only ever charged for the seats you actually use. At the end of the month, you will be billed a pro-rated amount of the monthly developer seat price, based on the number of days the seat was used. This means you never end up paying for unused seats.
Ellf only charges you for the seats you actually use. At the end of the month, you will be billed a pro-rated amount of the monthly developer seat price, based on the number of days the seat was occupied. This means you never end up paying for unused seats.
In the subscription settings, you can set a maximum number of developer seats that can be allocated. Admins in the org can then flexibly invite others until the limit is reached. You can also pre-pay for a number of seats to add credits to your account and lock in the current monthly rate.
For example: Alex of ACME Inc. signed up for the Professional plan on June 1, and invites 2 developers, who join immediately. On June 16, another developer, Charlie, joins. At the end of the month, they’re billed 3 × $250, plus $125 for Charlie’s seat that was only used for half a month. Alex then sets the seat limit to 4, so no more developers can be invited. Annotators can still be invited at no cost, since the Professional plan includes unlimited free annotator accounts.
Ellf is priced per developer. Developers (and admins) are users that can operate the platform and start jobs, publish code and data to the cluster, and manage annotation and agents. Each developer or admin uses one seat.
The Professional plan also includes unlimited free annotator accounts. These are users who can be invited to your organization and assigned to tasks, and who are only able to access the annotator dashboard and annotation UI. In the Starter plan, there are no annotator accounts so every member is an admin or developer and uses a paid seat.